
Note:

sl = slip stitch
hdc= half double crochet
dc= double crochet
inc= increase
sc= single crochet
Top Tan Body:
Row
1 [ 6 st]: 6 sc in a magic ring
Row
2 [ 12 st]: inc x 6
Row 3
[ 17 st]: 1, inc, 1, inc, 2, inc, 1, inc, 1, inc
Row 4
[ 22 st]: 2, inc, 3, inc, 2, inc, 3, inc, 2, inc
Row 5
[ 27 st]: inc, 3, inc, 4, inc, 3, inc, 4, inc, 3
Row 6
[ 32 st]: 2, inc, 4, inc, 5, inc, 4, inc, 5, inc, 2
Row 7
[ 36 st]: 3, inc, 7, inc, 7, inc, 7, inc, 4
Row 8
[ 39 st]: 5, inc, 11, inc, 11, inc, 6
Row 9
[ 42 st]: 10, inc, 12, inc, 12, inc, 2
Row 10
[ 45 st]: 2, inc, 13, inc, 13, inc, 11
Row 11
[ 47 st]: 19, inc, 21, inc, 3
Row 12
[ 49 st]: 18, inc, 27, inc
Row
13 [51 st]: 19, inc, 28, inc
Row
14 [53 st]: 24, inc, ,25 inc
Row
15: Sl, hdc, 3dc, hdc, sl, repeat until you wrap around and finish off
Bottom Green Belly:
Row 1
[ 8 st]: 8 stitches in a magic ring
Row 2
[ 16 st]: Inc x 8
Row 3
[ 24 st]: (Sc, inc)x 8
Row 4
[ 32 st]: (Sc 2, inc)x 8
Row 5
[ 40 st]: (Sc 3, inc)x 8
Row 6
[ 48 st]: (Sc 4, inc)x 8
Row 7
[ 48 st]: Sc around
Row 8
[ 51 st]: (Sc 15, inc)x 3
Row 9
[ 54 st]: (Sc 16, inc)x 3
Row 10
[ 54 st]: Sc around
Slip
stitch and finish off
Tan Head
Spikes (make 5):
Row 1
[ 8 st]: 8 stitches in magic ring
Row 2
[ 16 st]: Inc x 8
Row 3
[ 18 st]: (Sc 8, inc)x 2
Row 4
[ 12 st]: (Sc, dec)x 6
Row 5
[ 9 st]: (Sc 2, dec)x 3
Row 6
[ 9 st]: Sc around
Slip
stitch and finish off
Small Green Dot:
Row 1
[ 6 st]: 6 st in a magic ring
Slip
stitch and finish off
Medium Green Dot (make 1 or 2):
Row 1
[ 6 st]: 6 st in a magic ring]
Row 2
[ 12 st]: Inc x 6
Slip
stitch and finish off
Assembly:
1.
Insert and attach your safety eyes if you have them.
2.
Sew with loop stitch the bottom green belly to the inside of the tan top piece
a bit above where the ruffles begin. Make sure you can not see your stitches
from the outside by not piercing your needle all the way through the fabric.
3.
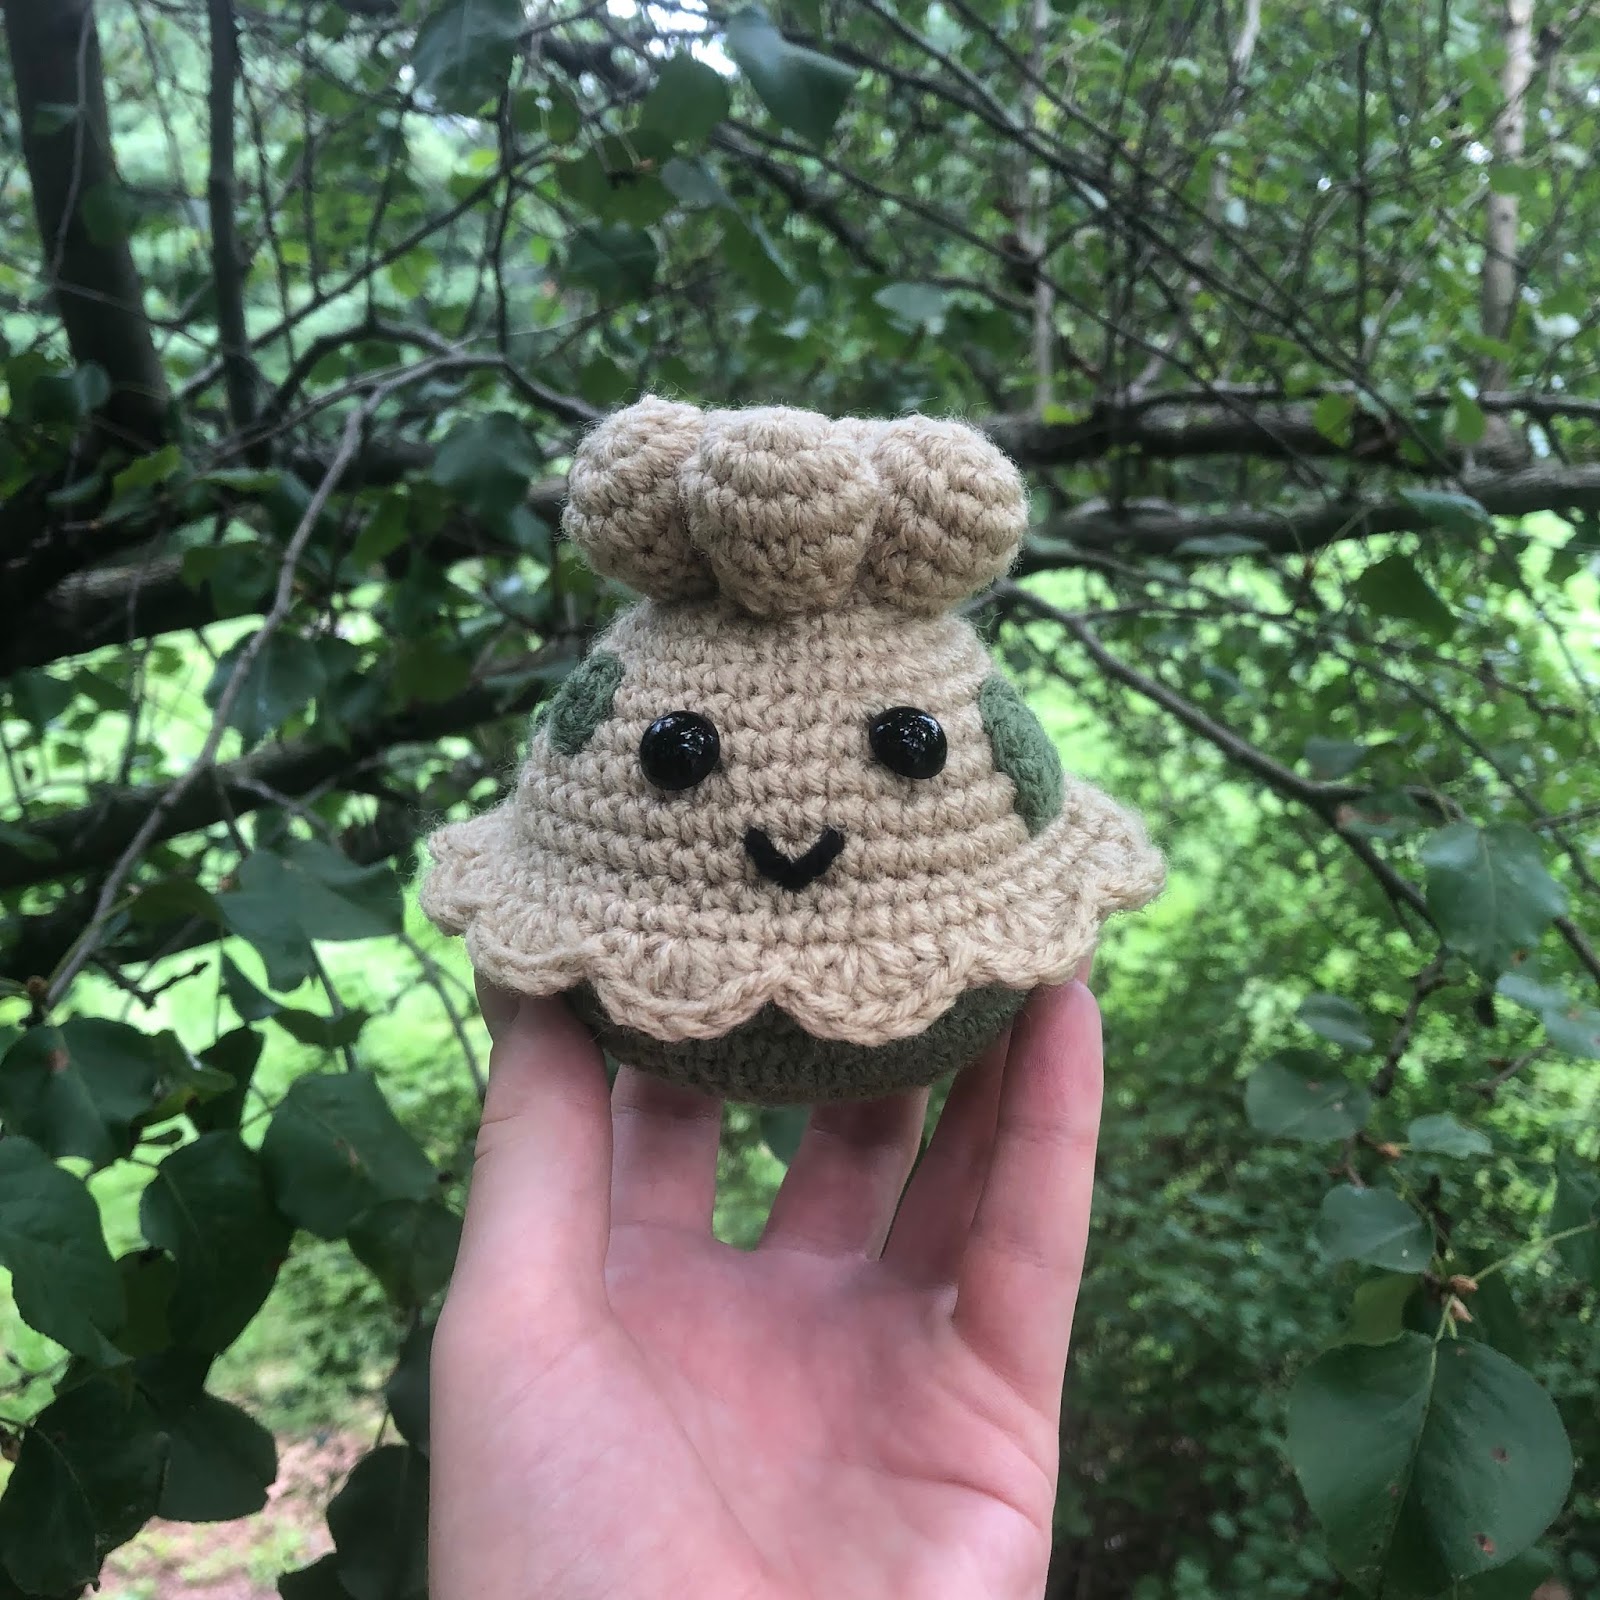
Using the loose tails of the head spikes sew them onto the top of the head in a
circular pattern as pictured below.

4. Sew on the medium
spot by the right eye and the small spot by the left eye as pictured below.
Optionally you can sew on another medium spot (pictured above) towards the back
left of the Shroomish. These spots can really go anywhere you like them to.

5. Embroider on a mouth and
using black yarn/floss and you are all done!
